Learn how to live stream video using the HEVC/H.265 video compression standard with Wowza Streaming Engine™ media server software.
Note: Public support for HEVC/H.265 is available in Wowza Streaming Engine 4.8.0 and later, while preview support is available in earlier versions (4.1.0 - 4.7.8).
About HEVC/H.265
High Efficiency Video Coding (HEVC), also called H.265, is a video compression standard developed as a successor to the H.264/MPEG-4 AVC ISO standard. HEVC enables more compression than H.264 with comparable image quality. As a result, HEVC can provide substantially better video quality at lower bitrates. Targeted at next-generation HDTV displays, HEVC supports 8K ultra-high-definition video and resolutions up to 8192 x 4320 pixels.
HEVC/H.265 video compression hasn't been widely adopted by encoding technologies or player vendors. Wowza Streaming Engine 4.1 and later offers support for the HEVC/H.265 standard.
Transcode to H.265
Configure Wowza Streaming Engine to transcode a live video stream to H.265 for MPEG-DASH and HLS playback in VLC media player.
Configure the live application
Complete the following steps to deliver MPEG-DASH and Apple HLS video and to transcode using the H.265 template:
- In Wowza Streaming Engine Manager, click the Applications tab, and select your live application in the contents panel.
- Under Playback Types, confirm that MPEG-DASH is enabled for MPEG-DASH playback and that Apple HLS is enabled for Apple HLS playback.
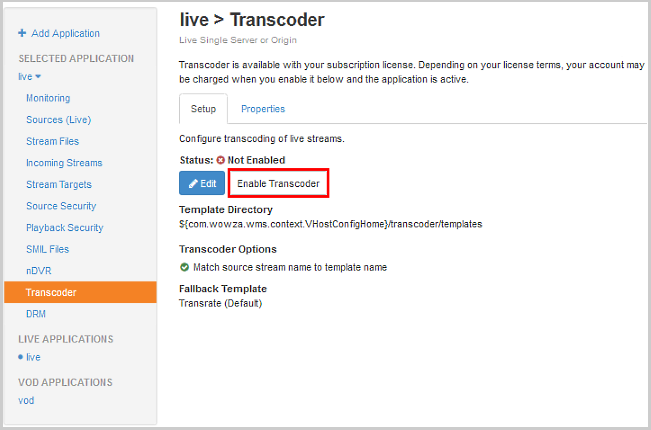
- Click Transcoder in the contents panel and, if necessary, click Enable Transcoder.

Note: Wowza Streaming Engine must be properly licensed to enable Transcoder. For details, see Licensing Transcoder.
- When Transcoder is enabled, click Edit on the Setup tab of the Transcoder page.
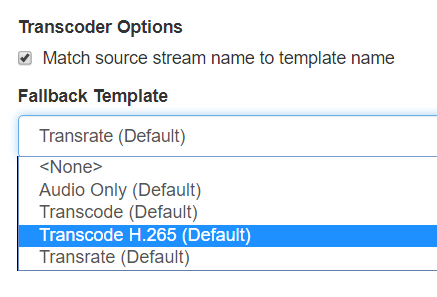
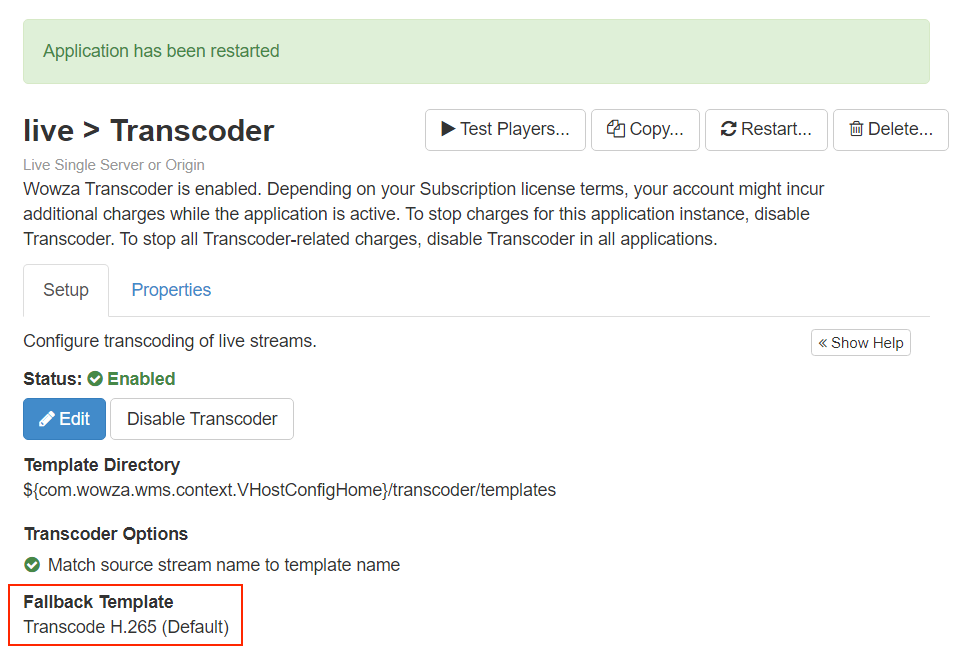
- From the Fallback Template menu, choose the Transcode H265 (Default) template.

- Deselect Match incoming stream name to template name.
Note: If you leave Match incoming stream name to template name selected, the fallback template isn't always used. When Match incoming stream name to template name is selected, if the name of the template and the name of a stream are the same, the stream uses the corresponding transcoder template, not the fallback template.
- Click Save, and then click Restart Now.
Now, all incoming streams will be processed by the H.265 template.

Configure the H.265 transcoder template
Configure HEVC/H.265 transcoding by editing the H.265 Transcoder template file.
You can also configure the encoding presets and decoding presets in the H.265 Transcoder template via Wowza Streaming Engine Manager. For details, see Configure the Transcoder in Wowza Streaming Engine Manager.
- Navigate to [install-dir]/transcoder/templates and open transcode-h265.xml in a text editor.
- In the <PostProcess> block, set the BufferSize to 5000. This helps to keep the audio and video synchronized in the transcoded output renditions, but it may also increase latency before playback starts. Adjust the buffer size as needed to maintain A/V synchronization while minimizing latency.
- Edit the <Encode> and <Decode> blocks as desired. The H.265 template includes three encode profiles that you can enable, disable, or edit:
- A 720p high-definition, medium-bandwidth profile at 2,400,000 bits per second. This encoding profile is enabled by default.
- A 1080p full high-definition, high-bandwidth profile at 4,500,000 bits per second. Disabled by default.
- A 4K ultra-high-definition, high-bandwidth profile at 11,600,000 bits per second. Disabled by default.
- Save your changes.
Adjust CPU resources
Your video may require higher video quality and CPU usage than the default encoding configuration for H.265. To increase video quality and CPU usage, use the performance_level parameter. It controls encoding performance by balancing speed and video quality.
The performance_level parameter can be configured using a range from 1 (fastest) to 30 (best quality). By default, performance_level is set to 15, which allows for balanced speed and performance.
Note: These instructions apply to Wowza Streaming Engine instances that run Transcoder on a standard hardware configuration. If you run Transcoder on GPU-accelerated hardware, see any of the articles listed on the Hardware acceleration page and the documentation for your graphics card for recommendations on managing resources when transcoding using HEVC.
- In transcode-h265.xml, add the performance_level parameter within the <Parameters> container element of all video encoding presets with <Codec> set to H.265.
-
For <Value>, specify a value less than 15 for lower video quality and CPU usage. Some sample values include 1 (fastest), 8 (fast), 15 (balanced), 20 (better quality), and 30 (best quality).
<Encode>
   ...
   <Video>
      <Codec>H.265</Codec>
      ...
      <Parameters>
         <Parameter>
            <Name>mainconcept-h265.performance_level</Name>
            <Value>8</Value>
            <Type>Long</Type>
         </Parameter>
      </Parameters>
   </Video>
   ...
</Encode>
Note: You may have to experiment to find the right value. If you set this parameter to a value higher than your available CPU resources can handle, real-time encoding will lag and eventually stop. When this happens, skip frame messages appear in the Wowza Streaming Engine logs.
- Save your changes.
Add custom properties for playback
After the Transcoder template is configured, you must add custom properties to the application to enable HEVC playback in players.
Note: Access to the Properties tab is limited to administrators with advanced permissions. For more information, see Manage credentials.
- In Wowza Streaming Manager, from the application detail page, click the Properties tab.
- In the Quick Links bar, click Custom.
- In the Custom properties section, click Edit.
- Click Add Custom Property, specify the following settings in the Add Custom Property dialog box, and then click Add:
Path Name Type Value /Root/Application/HTTPStreamer
httpOriginMode String Set to on. /Root/Application/HTTPStreamer mpegdashCacheControlPlaylist String Set to max-age=1. /Root/Application/HTTPStreamer mpegdashCacheControlMediaChunk String Set to max-age=3600. - Click Save and then restart the application to apply your changes.
Alternatively, you can add the properties directly to the Application.xml file located at [install-dir]/conf/[application-name]/. To do so, open Application.xml in a text editor and add the following to the <HTTPStreamer>/<Properties> container element:
<Property>
    <Name>httpOriginMode</Name>
    <Value>on</Value>
    <Type>String</Type>
</Property>
<Property>
    <Name>mpegdashCacheControlPlaylist</Name>
    <Value>max-age=1</Value>
    <Type>String</Type>
</Property>
<Property>
    <Name>mpegdashCacheControlMediaChunk</Name>
    <Value>max-age=3600</Value>
    <Type>String</Type>
</Property>
Prepare the VLC player
Configure the VLC media player to play the transcoded 720p (default) rendition of the HEVC stream.
Prepare VLC media player
- Download and install VLC media player. To test Apple HLS playback or MPEG-DASH playback, use the latest version of the Official download of VLC media player.
- On the VLC media player Media menu, click Open Network Stream.
- Enter the URL of the stream that you want to play in the Please enter a network URL field and then click Play. The stream URLs for the default 720p encoding profile should have the following formats:
Apple HLS
http://[wowza-ip-address]:1935/myApplication/[stream-name]_720p/playlist.m3u8
MPEG-DASH
http://[wowza-ip-address]:1935/myApplication/[stream-name]_720p/manifest.mpd
Where [wowza-ip-address] is the IP address of your Wowza Streaming Engine server instance and [stream-name] is the name of the stream published to the live application.
Notes:
- These instructions play only the default 720p encode of the HEVC stream. If you changed the encode or decode properties in the H.265 transcoder template to enable a different encode, adjust the [stream-name]_[profile-name] value in your stream URL to match. If you enabled multiple encodes, set up adaptive bitrate Stream Name Groups before continuing.
- By default, VLC media player is configured with a very small caching buffer. This can lead to choppy playback initially but it will eventually smooth out as VLC automatically increases the size of this buffer. You can increase the size of the caching buffer by adjusting the Caching property in the Open Media dialog box.


